

Planning for Installation Day: Managing Your Home's Downtime
When a heating system suddenly fails, the very first question homeowners ask is: how long does a typical furnace installation actually take? At Metropolitan Heating & Air Conditioning, our team understands that facing a major system replacement during the peak of a Scarborough winter can be stressful. The anxiety of wondering exactly how long the house will be without active heating is entirely normal. A professional installation is not a rushed, single-step job; it is a meticulously planned, multi-phase mechanical process designed by our experienced technicians to ensure long-term safety and optimal performance.
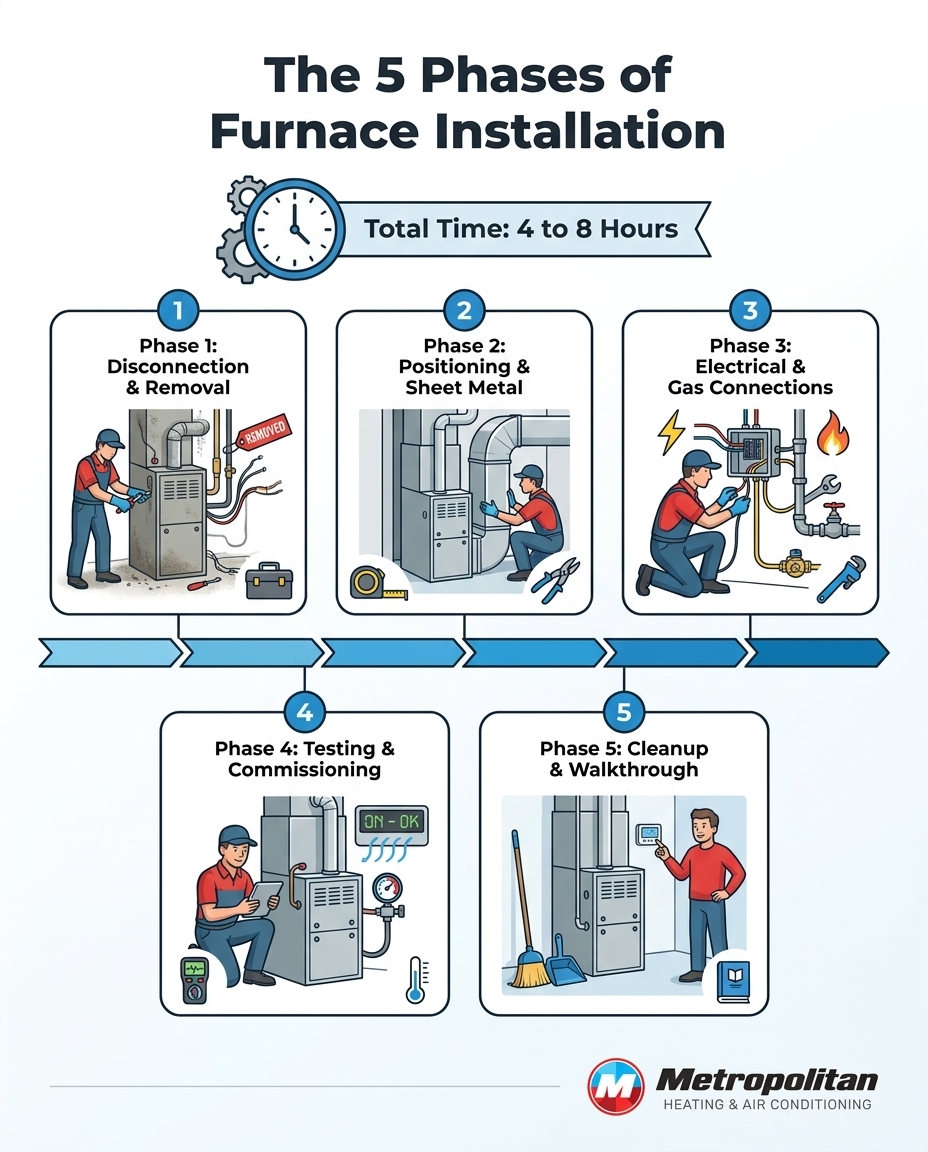
For a standard residential replacement, the baseline timeframe typically ranges from four to eight hours. Understanding this timeline helps families plan their day around our technicians' work, ensuring pets are secured, schedules are adjusted, and expectations are clearly set. By breaking down the day into distinct phases, it becomes clear why professional heating services require this dedicated block of time. Rushing the process leads to compromised safety, inefficient operation, and premature breakdowns. Instead, our technicians follow a strict protocol that prioritizes precision over speed, guaranteeing that once the new system is turned on, it will run safely and reliably for years to come.
Phase 1: Safe Disconnection and Old Unit Removal
The first one to two hours of any installation are entirely dedicated to safety and site preparation. Before any new equipment is brought inside, the existing unit must be completely isolated from the home's utility lines. Technicians use this time to prep the site, lay down protective floor coverings, and inspect the current ventilation and ductwork setup to identify any required modifications.
1. Utility Disconnection: The primary gas supply valve is shut off, and the electrical breaker is locked out. Technicians verify that no live power or gas is flowing to the equipment before proceeding.
2. System Draining: For high-efficiency condensing models, internal condensation lines and traps are carefully drained to prevent water damage during the extraction process.
3. Mechanical Separation: The old unit is unbolted from the return air drop and the main supply plenum. The exhaust venting is safely detached and capped if necessary.
4. Careful Extraction: The heavy, often bulky old furnace is maneuvered out of the basement or utility closet. Older units require meticulous handling to ensure they do not damage the home's interior walls, door frames, or existing ductwork during removal.
This careful approach sets the stage for a successful project. For example, during a spring replacement of a severely leaking 28-year-old unit, our technicians methodically dismantled the deteriorating system before hauling it away, ensuring the surrounding basement area remained completely undamaged. Whether handling a routine upgrade or a complex furnace installation in Ajax, this initial tear-down phase is critical for clearing the workspace and ensuring the safety of Scarborough area homes before the new system is introduced.
Phase 2: Positioning the New Unit and Custom Sheet Metal Fitting
Once the space is cleared, the installation transitions into the mechanical fitting phase. This is often the most labor-intensive portion of the day, taking anywhere from one to three hours. The new equipment must be carefully maneuvered into place, set on vibration-absorbing pads, and perfectly leveled. An unlevel unit can lead to improper drainage, excessive motor wear, and irritating rattling noises during operation.
Custom Sheet Metal Fabrication: Modern furnaces are frequently shorter or narrower than the bulky units manufactured decades ago. Because the new unit rarely matches the exact dimensions of the old one, our installers must fabricate custom sheet metal transitions on-site. This custom ductwork connects the top of the new furnace to the existing supply plenum and the side to the return air drop.
Ensuring an Airtight Seal: This sheet metal fitting cannot be rushed. An airtight seal is absolutely necessary for energy efficiency; any gaps will allow conditioned air to escape into the basement or utility room, forcing the system to work harder to heat the living spaces. Technicians carefully measure, cut, bend, and seal these transitions using specialized mastic or foil tape to guarantee optimal airflow.
System Upgrades: Upgrading system types may require slight modifications to the plenum or venting structure. When reviewing a cost comparison of single-stage vs. two-stage furnaces, it is important to factor in that advanced variable-speed models require exact airflow calibration. The custom sheet metal work performed during this phase ensures the ductwork can handle the specific static pressure requirements of the new technology, which is especially vital for maintaining consistent comfort throughout the rigorous winter heating season.
Phase 3: Electrical Connections and the Neat-and-Tidy Wire Wrap
With the unit physically anchored and sealed to the ductwork, the focus shifts to restoring the utility connections. This phase typically takes one to two hours and demands absolute precision. Rushed electrical or gas work is a leading cause of future breakdowns and safety hazards, which is why licensed professionals take their time to execute these steps flawlessly.
Gas Line Integration: A new gas flex line or hard-piped connection is established from the shutoff valve to the unit's internal gas valve. A drip leg is installed to catch any moisture or debris in the gas supply, and all threaded connections are treated with specialized sealant and tested for microscopic leaks.
Electrical and Thermostat Wiring: The primary high-voltage electrical whip is connected to power the blower motor and inducer, while the low-voltage thermostat wire is integrated into the control board. Modern smart thermostats and two-stage heating systems require specific wiring configurations to communicate correctly with the main board.
The Neat-and-Tidy Wire Wrap: At Metropolitan Heating & Air Conditioning, we believe one of the clearest indicators of a professional installation is the final presentation of these connections. The standard is a neat-and-tidy wire wrap—ensuring all internal and external wires are bundled, secured with zip ties, and routed cleanly along the cabinet. A messy "rat's nest" of wires is unacceptable. This meticulous attention to detail proves the installation prioritizes long-term safety over speed, ensuring that future maintenance access is unobstructed and that vibrations won't cause wires to chafe over time in Scarborough area homes.
Phase 4: Final Testing, Commissioning, and Rigorous Cleanup
Many homeowners assume the job is done the moment the unit turns on and begins blowing warm air. In reality, the final commissioning phase takes up to an hour and is critical for verifying that the equipment operates exactly to the manufacturer's engineering specifications during the winter heating season.
• Gas Pressure Calibration: Technicians use a manometer to measure and adjust the incoming and manifold gas pressures. If the pressure is too high, the heat exchanger can overheat; if it is too low, the system will struggle to warm the house efficiently.
• Airflow and Temperature Rise: The static pressure of the ductwork is measured, and the blower speed is adjusted to ensure the temperature of the air leaving the vents falls within the safe operating range specified by the manufacturer.
• Safety Limit Verification: Critical safety sensors, including the flame rollout switch, high-limit switch, and carbon monoxide detectors, are manually tested to ensure the unit will shut down immediately in the event of a malfunction.
• Thorough Workspace Cleanup: A rigorous cleanup process ensures the utility room is left spotless. All old equipment, sheet metal scraps, wire clippings, and packaging materials are swept up and hauled away.
• Homeowner Walkthrough: The lead technician walks the homeowner through the operation of the new system, explains the thermostat settings, demonstrates exactly how to change the air filter, and answers any remaining questions.
Whether completing a standard swap or a comprehensive furnace replacement in Amberlea, this final phase guarantees that the system is safe, efficient, and ready for continuous operation before the technicians ever leave the driveway.
Will My House Freeze While the Heat Is Off?
The most pressing concern for homeowners scheduling a replacement between November and March is the fear of their house freezing solid during the four to eight hours the heating system is offline. With Scarborough and GTA average winter lows frequently dropping below freezing, an efficient but meticulous installation timeline is critical to restoring home comfort safely.
The Reality of Heat Retention: Reassure yourself that a well-insulated home retains heat surprisingly well over a four-to-six-hour period. If the house is brought up to a comfortable temperature before the technicians arrive, the thermal envelope of the building (the insulation in the walls and attic) will trap that warmth. During a typical daytime installation, the indoor temperature usually only drops by a few degrees.
Minimizing the Drop: Homeowners are advised to keep all exterior doors and windows tightly closed during the installation process. Avoid running bathroom exhaust fans or range hoods, as these actively pull warm air out of the house. Technicians are trained to work efficiently in sub-zero conditions to minimize the actual "no heat" window, staging their tools and equipment to limit how often they need to open the exterior doors.
Emergency Priorities: In severe weather situations, emergency replacements are prioritized to restore safe temperatures rapidly. In one extreme case our team handled recently, a rooftop unit completely failed during a bitter cold snap with a -30 windchill. Because we prioritized the emergency replacement for the very next business day and worked efficiently through the timeline, the property regained safe heating before the interior temperatures reached critical lows, protecting the plumbing and keeping the family safe in Scarborough area homes.
Variables That Can Extend Your Installation Time
While the four-to-eight-hour baseline applies to the vast majority of direct replacements, certain structural or mechanical variables can push an installation toward the eight-hour mark or slightly beyond. Planning for these variables ensures a smooth process, and these factors are almost always identified and discussed during our initial property inspection so there are no surprises on installation day.
• Standard Direct Replacement — Impact on Timeline: 4 to 6 Hours — Why It Is Necessary: Straightforward swap of similar equipment with minimal ductwork changes.
• High-Efficiency Venting — Impact on Timeline: Adds 1 to 2 Hours — Why It Is Necessary: Requires drilling new exhaust paths to the exterior of the home.
• Extensive Ductwork Repair — Impact on Timeline: Adds 2 to 3 Hours — Why It Is Necessary: Custom fabrication needed to correct poor airflow or fit differently sized units.
• Difficult Access — Impact on Timeline: Adds 1 Hour — Why It Is Necessary: Navigating tight crawlspaces, narrow basement stairs, or attic hatches safely.
Venting Upgrades
Moving from an older, mid-efficiency model (which vents exhaust gases up a traditional metal chimney) to a modern, high-efficiency condensing model requires completely new venting. High-efficiency units extract so much heat from the combustion process that the resulting exhaust is cool and acidic, requiring specialized PVC piping to be run directly to the exterior of the house. Drilling through exterior walls, routing the PVC pipes safely between joists, and properly sealing the penetrations adds time but ensures safe, code-compliant operation during the winter heating season.
Ductwork Modifications
Older homes may require custom transitions to fit modern, differently sized units. If the existing return air drop is undersized—a very common issue in older properties—it must be rebuilt to allow the new, powerful blower motor to "breathe" properly. Proper airflow is non-negotiable. If the ductwork restricts the air, the new system will overheat, short-cycle, and fail prematurely. Taking the extra time to modify the sheet metal cannot be rushed. Discussing these necessary modifications is often part of exploring the scope of work and reviewing financing options for a new unit prior to the scheduled date.
Frequently Asked Questions About Installation Day
How long does it take to replace a furnace?
A standard residential replacement typically takes between four and eight hours. This timeframe includes the safe removal of the old equipment, custom sheet metal fitting, electrical wiring, and a thorough final commissioning process to ensure the new system operates safely.
Can a furnace be installed in one day?
Yes, the vast majority of residential installations are completed within a single day. Professional installation crews arrive in the morning with all necessary equipment and materials, ensuring the heat is fully restored and tested before they leave the property that same afternoon.
How long will my house be without heat during a furnace replacement?
Your home will be without active heating for the duration of the four-to-eight-hour installation window. However, by keeping doors and windows closed, a well-insulated house will generally only experience a minor temperature drop of a few degrees, even during cold weather in Scarborough area homes.
What happens on furnace installation day?
Technicians will first shut off the gas and electrical supply to safely remove the old unit. They will then position the new equipment, fabricate custom sheet metal to connect it to your ductwork, establish safe gas and electrical connections, and finally perform a rigorous series of safety and performance tests.
Do I need to be home during the entire furnace installation?
An adult must be present to grant access to the property and review the final walkthrough. While you do not need to hover over the technicians while they work, remaining on-site or easily accessible by phone allows the lead installer to quickly address any unexpected variables that may arise regarding ductwork or venting.
Secure Your Comfort with a Reliable Local Team
Understanding the timeline of a major heating upgrade eliminates the anxiety of installation day. A four-to-eight-hour investment of time yields years of reliable, safe, and efficient heating for your family. Professional craftsmanship—from the custom sheet metal fabrication to the neat-and-tidy wire wrap—is always worth the time it takes to do the job right. If you are facing the winter heating season with an aging or unreliable system, do not wait for a complete breakdown. Reach out to an experienced local professional to discuss your specific replacement timeline, evaluate your ductwork, and secure your home's comfort long before the extreme cold arrives.
Schedule Expert Service
Or Contact Us
Other Blogs
testimonials
hear what our satisfied clients have to say

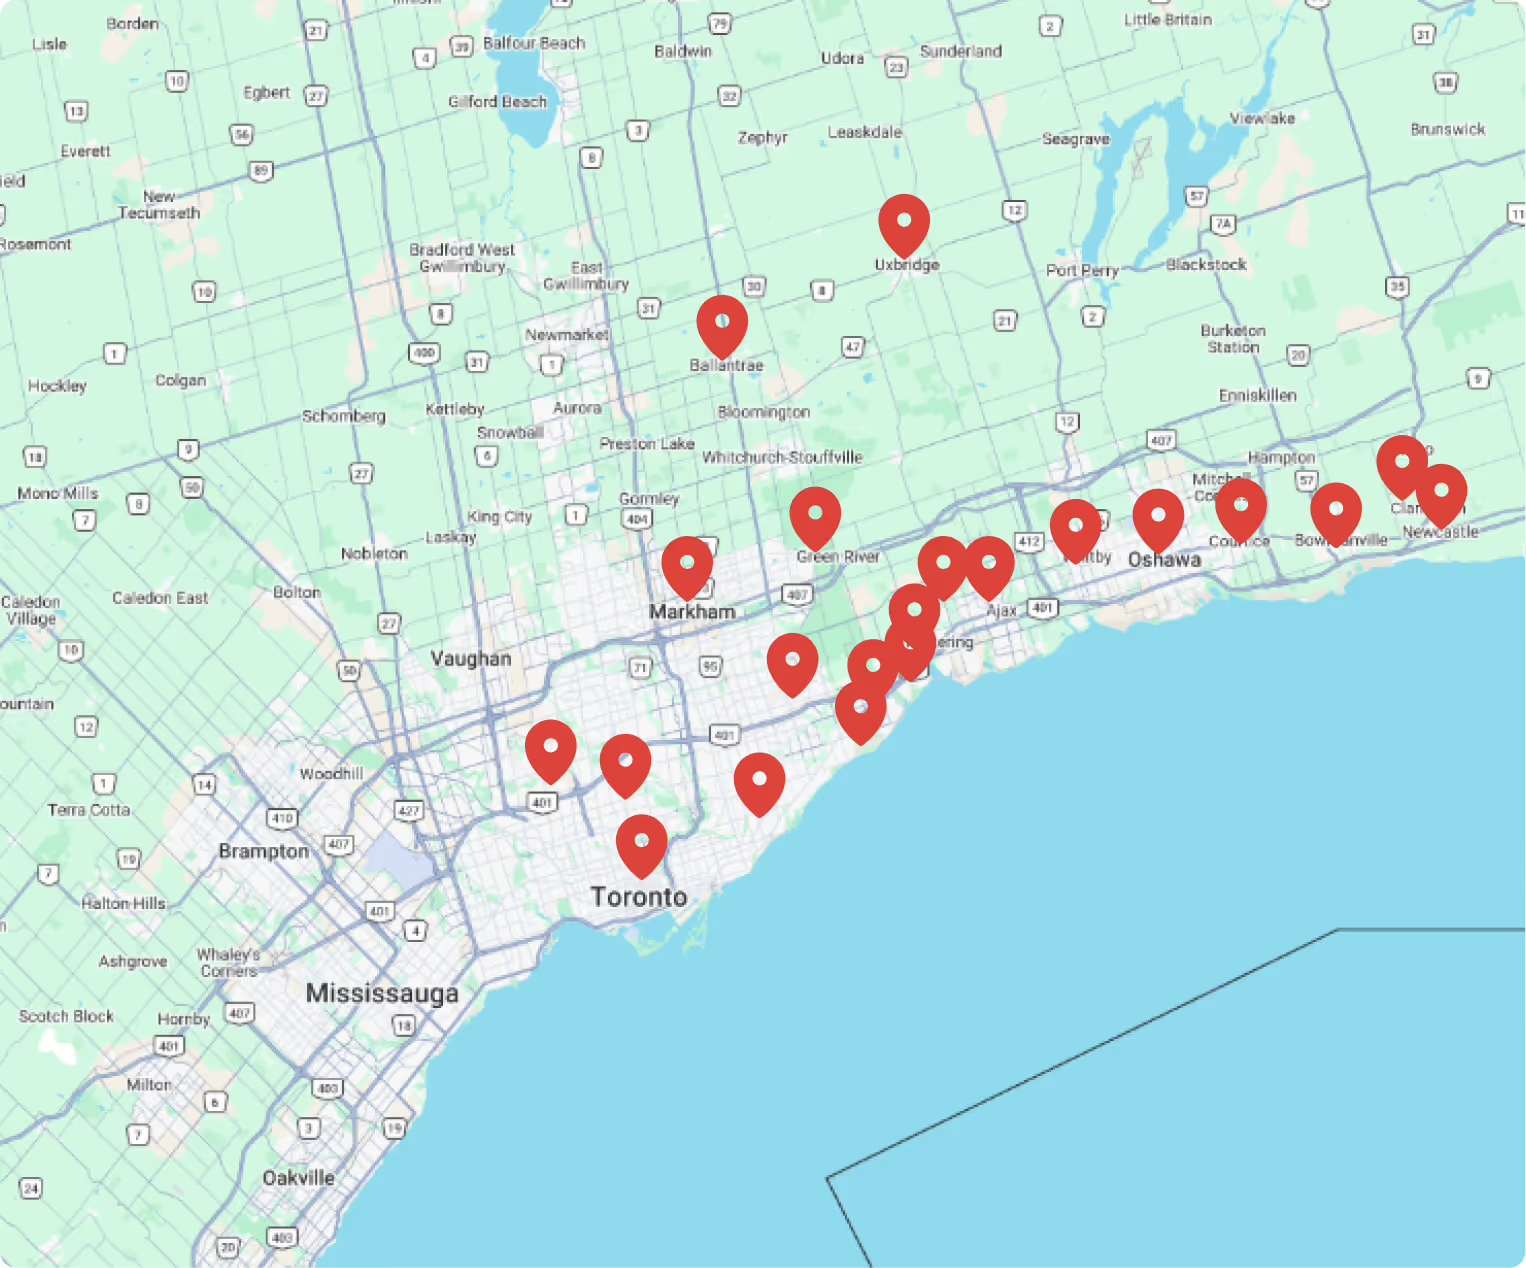
where we operate
Service areas
contact us
Let’s get in touch!